Разделы презентаций


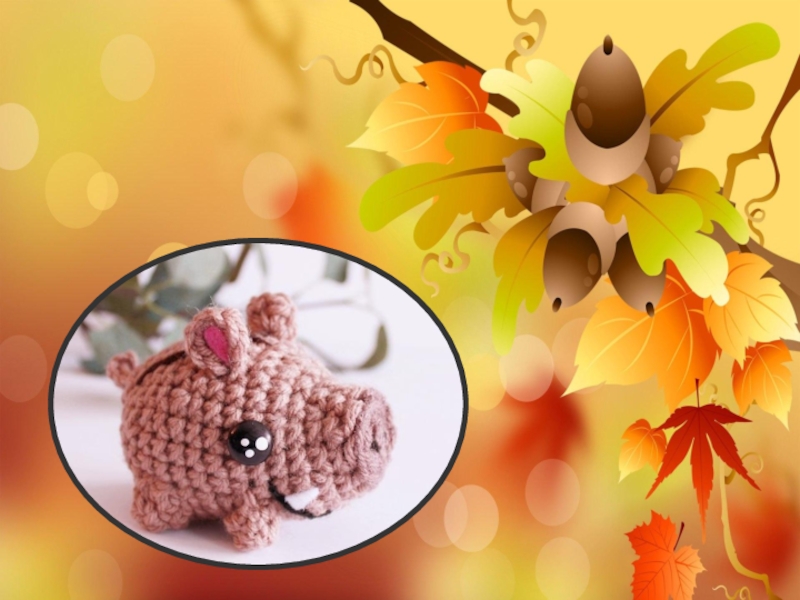
pig на двух языках

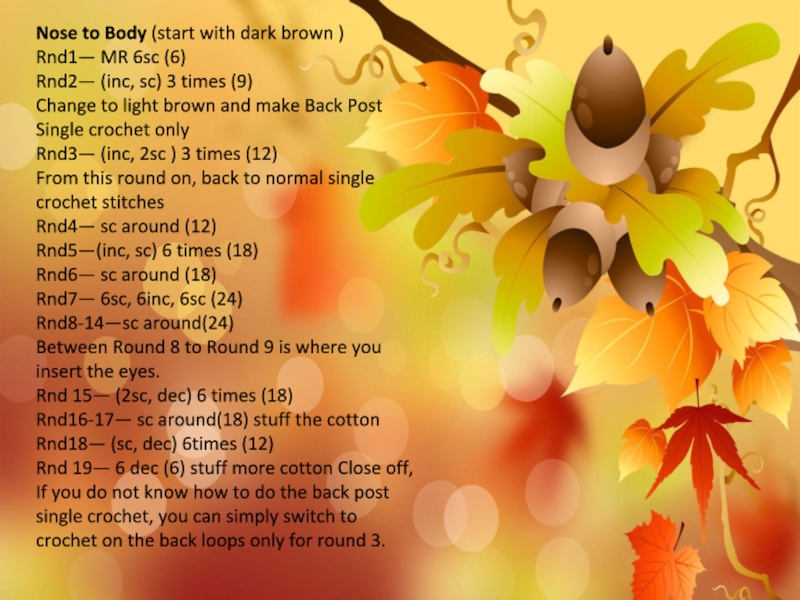
Nose to Body (start with dark brown ) Rnd1— MR 6sc (6) Rnd2— (inc, sc) 3 times (9) Change to light brown and make Back Post Single crochet only Rnd3— (inc,

Слайды и текст этой презентации

Слайд 1


Слайд 2Nose to Body (start with dark brown )
Rnd1— MR

6sc (6)
Rnd2— (inc, sc) 3 times (9)
Change to

light brown and make Back Post Single crochet only
Rnd3— (inc, 2sc ) 3 times (12)
From this round on, back to normal single crochet stitches
Rnd4— sc around (12)
Rnd5—(inc, sc) 6 times (18)
Rnd6— sc around (18)
Rnd7— 6sc, 6inc, 6sc (24)
Rnd8-14—sc around(24)
Between Round 8 to Round 9 is where you insert the eyes.
Rnd 15— (2sc, dec) 6 times (18)
Rnd16-17— sc around(18) stuff the cotton Rnd18— (sc, dec) 6times (12)
Rnd 19— 6 dec (6) stuff more cotton Close off, If you do not know how to do the back post single crochet, you can simply switch to crochet on the back loops only for round 3.
Nose to Body (start with dark brown ) Rnd1— MR 6sc (6) Rnd2— (inc, sc) 3 times

Слайд 3Ears
(light brown) make 2 MR 2sc, 3hdc, 2sc (7)

, leave a long tail to sew to the head

later Leg
(light brown) make 4
Rnd1— MR 6sc (6)
Rnd2 — (sc, inc ) 3 times (9) .
It’s ok not to stuff the legs but if you want to , you can.
Leave a tail to sew to body later Tail (light brown)
Chain 4 and start from the 2nd loop from hook: sc, hdc, hdc , leave a long tail to sew to body later. Sewing l
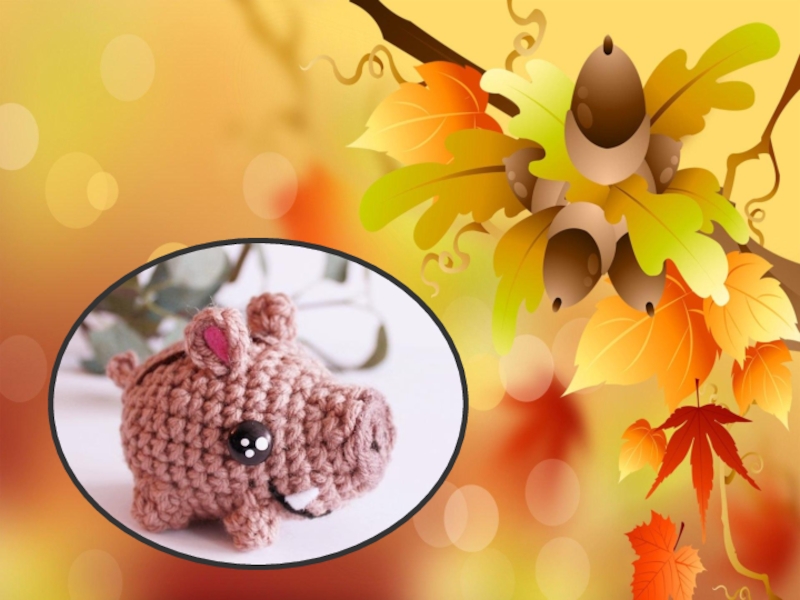
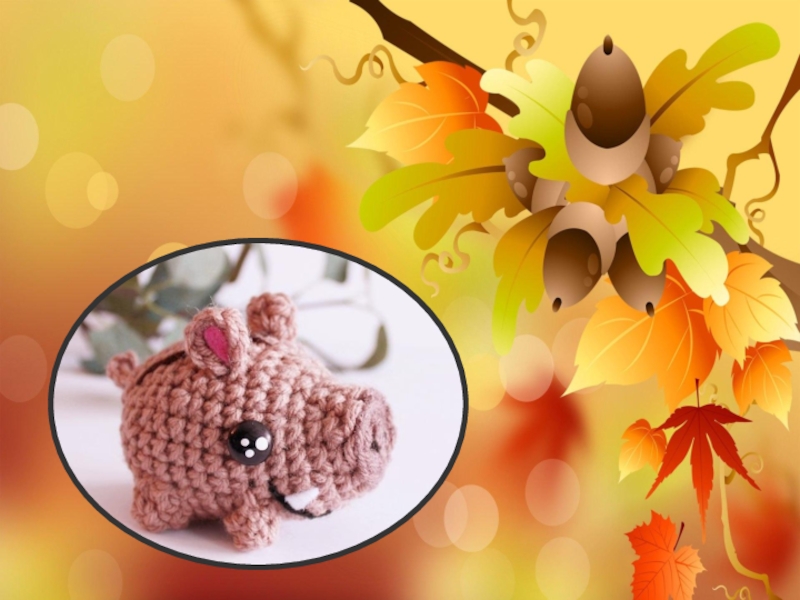
Ears—when sewing the ears to the body, make sure they are facing to the sides but not to the front, see it better in the picture below
Ears (light brown) make 2 MR 2sc, 3hdc, 2sc (7) , leave a long tail to sew

Слайд 4l Legs and tail—in the picture below , you will

see where to sew the legs and tail.
Final steps l

Stripes on the back-Use dark brown to sew 3 stripes on the back.
l Mouth and nose : Use black thread/yarn to sew the mouth and nose to the doll.
l Cut off 2 shape of tear drops from the pink felt as the inner ears, hot glue to the ears.
l Cut off 2 small triangles and hot glue to the mouth as teeth.
l Paint the white dots to the eyes.
TAG #OhanaCraft on the social media so I will be able to see your aBoarable!  This pattern is an original pattern designed by Carrie Lu
l Legs and tail—in the picture below , you will see where to sew the legs and

Слайд 5Fowler of Ohana Craft.  Please do not claim this

pattern as your own. Feel free to share this pattern.

I’d appreciate that if you would link back to my blog/ FB /IG to credit me as an original pattern designer. A support follow will be great!  You may keep a copy for your own personal use but please DO NOT sell the pattern for your own profit.  You may sell products made from this pattern but please clearly credit the design to me–Carrie Lu Fowler of Ohana Craft–and provide a link to my blog/FB will be perfect!.  Permission is NOT granted for mass production or factory manufacturing of any kind.  Thank you for your support and understanding and being friendly & respectful!

Перевод на русский

Нажмите сюда, чтобы увидеть перевод

Fowler of Ohana Craft.  Please do not claim this pattern as your own. Feel free to

Слайд 9Нос и туловище
( начинаем тёмно-коричневым)
Ряд1 – КА из 6 сбн

(6)
Ряд2 – (сбн, пр)*3 (9)
Изменяем цвет нити на светло- коричневый

и продолжаем следующий ряд вязать за задние стенки петли.
Ряд3 – (пр, сбн)*3 (12)
Далее все остальные ряды продолжаем вязать за обе стенки петли.
Ряд4 – сбн по всему кругу (12)
Ряд5 – 6сбн, 6пр, 6сбн (24)
Ряды8-14 – сбн по кругу (24)
Между 8 и 9 рядами вставляем глазки.
Ряд15 – (2сбн, 1уб)*6 (18)
Ряды16-17 – сбн по кругу (18) материал хлопок
Ряд18 – (сбн, уб)*6 (12)
Ряд19 – 6уб (6)

Нос и туловище( начинаем тёмно-коричневым)Ряд1 – КА из 6 сбн (6)Ряд2 – (сбн, пр)*3 (9)Изменяем цвет нити

Слайд 10Уши
Светлый коричневый
Делаем 2 шт.
в КА 2 сбн, 2 плсн,

2сбн (7)
Оставьте длинную нить для пришивания.

Ноги
Светлый коричневый
Делаем 4 шт.
Ряд1

– КА из 6сбн (6)
Ряд2 – (сбн, пр)*3 (9)
Лучше ноги не набивать, но если вы хотите можете положить немного наполнителя.
Когда вы пришиваете уши к телу , убедитесь, что они обращены в стороны, но не спереди.
УшиСветлый коричневыйДелаем 2 шт. в КА 2 сбн, 2 плсн, 2сбн (7)Оставьте длинную нить для пришивания.Ноги Светлый

Слайд 11Используйте тёмно-коричневый, чтобы сшить на спине полосы.
Отрежьте 2 детали в

форме слезинок из розового фетра и с помощью горячего клея

прилепите как внутренние уши.
Отрежьте из белого фетра два небольших треугольника. Это клыки. Ещё не забудьте сделать ротик.
Используйте тёмно-коричневый, чтобы сшить на спине полосы.Отрежьте 2 детали в форме слезинок из розового фетра и с

Обратная связь

Если не удалось найти и скачать доклад-презентацию, Вы можете заказать его на нашем сайте. Мы постараемся найти нужный Вам материал и отправим по электронной почте. Не стесняйтесь обращаться к нам, если у вас возникли вопросы или пожелания:

Email: Нажмите что бы посмотреть 

Что такое TheSlide.ru?

Это сайт презентации, докладов, проектов в PowerPoint. Здесь удобно  хранить и делиться своими презентациями с другими пользователями.


Для правообладателей

Яндекс.Метрика